
Blog
KNX Wiring: Just Like a Classic Installation — Only Smarter

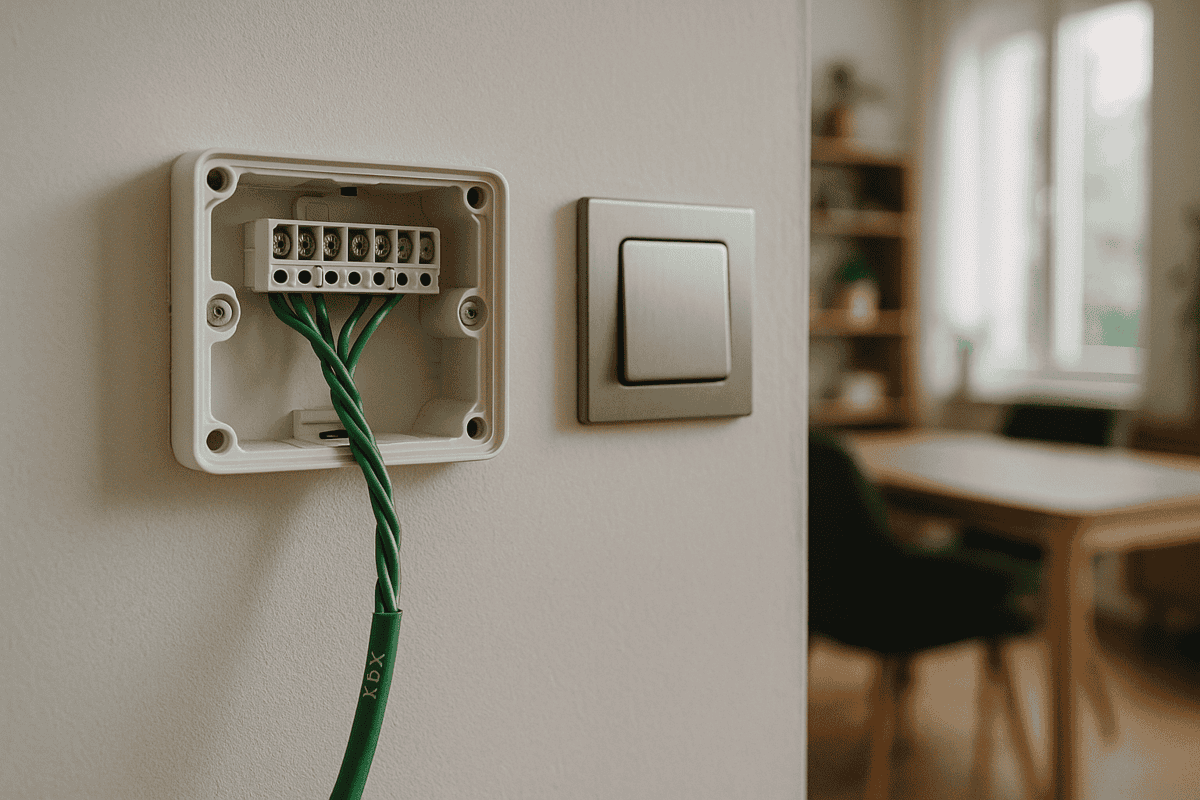
Let’s clear something up straight away. If you’re wondering how KNX wiring differs from a conventional electrical installation — and whether you’ll need to gut your entire home to adopt it — the answer is simpler than you might expect. KNX keeps the same fundamental logic as a standard installation: lights, sockets, switches. It simply adds one extra cable through which all devices talk to each other.
What KNX Wiring Is and How It Works
KNX is an internationally recognised open standard, certified in over 190 countries. Think of a KNX installation as a conventional electrical system with a “nervous system” added on top.
Your existing 230 V cabling — the wiring that powers lights and sockets — stays exactly where it is. What you add is a single additional cable, the KNX bus, which connects every smart device in the building. This bus cable is typically green-jacketed and runs alongside your power cabling.
In a traditional installation, a switch directly breaks or completes the circuit to a light. In a KNX system, the switch sends a signal along the bus to a KNX actuator — the device that actually opens or closes the circuit and switches the light. It’s a clean separation between command and execution, and that separation is what gives KNX its flexibility.
You can think of the actuator as an assistant that receives instructions and carries them out. The switch is no longer physically tied to one specific load — it can control anything, from anywhere, once the system is programmed.
For a deeper look at how KNX integration fits into a full building project, see our services overview.
KNX Wiring vs. Conventional Wiring: What Actually Changes
Did you know you can control the bedroom lights from the kitchen without touching a single wire? That’s the kind of flexibility KNX wiring delivers, while keeping all the safety and reliability of a conventional installation.
What you gain with KNX wiring:
- Centralised control: A single switch panel can manage 5–10 separate circuits. In a three-bedroom apartment, you can reduce the number of switches from 15 down to 6–8.
- Complex scenes: A single “leaving home” button switches off all lights, turns down the heating and arms the security system — in under a second, not the 2–3 minutes it takes to walk around doing it manually.
- Reconfiguration without re-wiring: Want the hallway switch to also control the bathroom light? That’s a 5-minute change in software, not a day’s work breaking into walls.
- Fast fault diagnosis: If a circuit stops working, the system tells you exactly where the fault is — switch, actuator or load — rather than leaving you guessing.
What you avoid with KNX wiring:
- Internet dependency: The KNX bus operates independently of your broadband connection. If your router goes down, your lights still work.
- Short product lifespans: KNX components are rated for 20+ years of service, compared with the 3–5 year lifespan typical of consumer Wi-Fi smart-home devices.
- Wireless interference: The bus is a physical cable, so it’s unaffected by microwave ovens, overcrowded routers or neighbours with dozens of wireless devices.
To put this in concrete terms: in a 200 m² villa with KNX wiring, a homeowner can control 45 lighting circuits from just 8 key panels. The equivalent conventional installation would have required 25–30 separate switches. The reduction in wall clutter — and the simplicity of daily use — is immediately noticeable.
In practice, the vast majority of homeowners who live with a KNX system for a year say they wouldn’t go back to conventional switches. Not because of the technology itself, but because of the day-to-day comfort it brings.
Explore how KNX lighting control is typically structured across different property types.
Technical Details: KNX Wiring for Professionals
One approach worth noting is mounting KNX relays at the switch position itself rather than concentrating everything in the distribution board. This reduces cabling runs by 30–40% and makes fault-finding faster — if a circuit fails, the problem is localised to that specific switch location rather than buried in a busy panel.
KNX bus cable specifications:
- Cable type: YCYM 2×2×0.8 mm (or Cat14 equivalent), with distinctive green jacket
- Topology: Free line with branches; maximum 1,000 m per segment, 64 devices per line
- Supply: 29 V DC, maximum 640 mA per line, from a dedicated KNX power supply unit
- Protocol: ISO/IEC 14543-3, compatible with products from 500+ certified manufacturers
The actuators commonly used in residential projects have 16 A contacts — sufficient for most standard circuits. For higher-draw loads such as boilers or heat pumps, dedicated KNX contactors rated at 25 A or 40 A are used instead.
Practical differences from conventional wiring:
- Separate control cable: The switch no longer needs a 1.5 mm² power cable — a 0.8 mm² signal cable is sufficient.
- Distributed actuators: Rather than all contactors being in the distribution board, actuators are spread throughout the building, close to the loads they control.
- Software configuration: The ETS6 software handles all programming — no more point-to-point physical wiring between control and load.
- Easy expansion: Adding new functions or scenes requires only programming, not additional cabling.
An experienced electrician familiar with conventional installations can typically learn KNX wiring in a week of focused training. The underlying logic is the same — you’re simply adding a communication layer between devices.
The ISO 14543-3 standard guarantees interoperability across manufacturers. A Jung switch can control an MDT actuator without any compatibility issues — something that simply isn’t possible within proprietary Wi-Fi ecosystems. Our KNX design and ETS programming service covers this configuration in full.
Common Questions About KNX Wiring
Do I need to redo my entire installation to add KNX?
No. Your existing 230 V wiring stays in place. You add the KNX bus cable alongside it and replace the switches with KNX-compatible ones, then add actuators. In retrofit projects — existing apartments or houses — around 80% of the existing cabling is kept. Only the control devices change.
What happens if a KNX actuator fails?
A actuator can be replaced in 10–15 minutes without cutting power to the rest of the building. Because actuators are mounted locally rather than in a central panel, the intervention is quick and contained. The system also flags exactly which component has the fault, so there’s no guesswork involved. See our KNX remote support and maintenance service for how ongoing monitoring works.
Does KNX wiring use more electricity than a conventional system?
The additional consumption is minimal — the KNX bus draws around 5–10 W per apartment, roughly the same as a single LED bulb. On the other hand, features like automatic switch-off schedules and energy-saving scenes typically reduce overall consumption by 15–25% compared with a conventional installation.
If you’d like to explore KNX energy monitoring in more depth, our KNX energy management page covers the options in detail.
Ready to Plan Your KNX Installation?
Whether you’re designing a new build or considering a retrofit, getting the wiring strategy right from the start saves time and cost down the line. Request a free consultation and we’ll review your plans, explain exactly what changes compared with a conventional installation, and give you a clear picture of what a KNX system would look like for your specific project.